|

TOOLS - While it may be useful and
pleasant to have several hundred dollars in tools at hand when
working glass, it is not necessary and most glass workers have
one or more tools that is really cheap but handy and useful.
Ironically, now that I see this picture on the screen, the most
heavily used tool and most homemade is not in the picture - I
made my own jacks.
| Tool Name |
Used For |
Source |
Est. Cost
|
Official Tool Has |
Cost
|
| Needle Nose Pliers |
Pulling and twisting glass |
Found, but also hardware store. |
$10.00 |
Same |
$10.00 |
| Diamond Shears |
Cutting and shaping glass, maneuvering pipes and
punties |
ARTCO, other suppliers |
$65.00 |
Same |
$55-150 |
| Knife |
Chilling punty line for crack off |
Found |
$0.00 |
Same |
$3.00 |
| Tweezers |
Pulling glass, picking off flaws, guiding punty |
Hardware store, cheap tools bin |
$3.50 |
Bent tip |
$15.00 |
| Scissors |
Trimming glass |
Found, but hardware and grocery stores sell them |
$0.00 |
Straight Shears |
$40.00 |
| Ducknose Shears |
Trimming glass (these are sheet metal shears) |
Hardware Store |
$15.00 |
Longer Nose |
$30.00 |
| Jacks (not shown) |
Shaping Glass |
Made from flat stock |
$5+hours |
Jacks |
$120+
|
|
OUTDOOR GLASS WORKING - My equipment is
outdoors, which leads to certain problems. Some of these problems
apply to any studio that is somewhat exposed to the outdoors,
such as Art Allison's enclosed, but unheated (except by the
furnace!) place.
- BUGS - In Texas we have these mud
daubers that look like small wasps but don't sting. They
do, however, try to make a nest wherever they can,
which includes the holes in blow pipes, which they fill
with mud which dries hard. An internet discussion
suggested golf tees or small pieces of wood to block the
opening and said any location with open walls has the problem. The most obvious suggestion is to make sure the
pipe are clear before using them.
Mosquitoes are a major problem in the south, especially
with West Nile Virus around. Any container of water, like a block
bucket or crack off bucket, can show larvae. But the answer is easy -
go to a hardware store or garden center and ask for a bottle of the small
grits or granules of BT mosquito larvae control. These are sold for small
ponds, birdbaths, water gardens, etc. BT is Bacillus thuringiensis which is
a living organism that attacks wiggly larvae - it is used on worms on plants
in other subspecies. Although the bottle in front of me does not make the
claim, one brand actually said it makes the water better for birds by adding
protein.
This stuff looks like grape nuts. Instructions call for a teaspoon for every
25 square feet. Think about the size of a bucket. 5-10 granules is enough
for a bucket. In my bird feeder and block bucket outdoors, one application
is good for about two weeks. The container says 7-14 days. I usually go out
about once a week and look at all the water standing around and either add a
few granules - the bottle has a shaker top - each time or more if I see
larvae. The stuff starts to work very fast in the immediate area of
the granules - you can see the larvae start to wiggle frantically and die,
but it takes a while settle to the bottom and to drift through the water, 24
hour kill per the bottle. The stuff is also sold in blocks (Mosquito Dunks
brand from this company) but these are for ponds and a waste of money for
adding to a small container. If kept dry, the stuff lasts for years. Read
the label before you buy and contact the company involved if you have
concerns. There is a skin contact warning, but I take this to mean for the
granules, not the water with a reasonably small quantity in it. [Confirmed
by e-mail from the company]
Summit Chemical -
Mosquito Bits 2006-04-02
Wood is chewed to
shreds by various bugs, so anything on the ground must be
pressure treated. One reason for rebuilding the support
for the annealler in metal was the deterioration of the
the wood at the bottom. Pressure treated wood on and near the
ground is a partial answer.
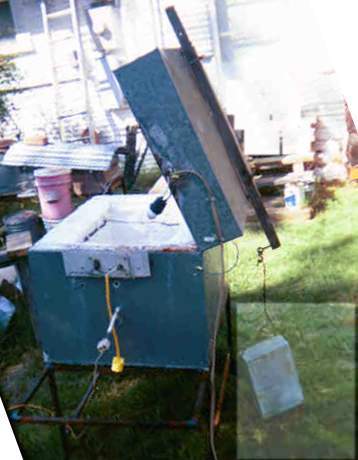
- RAIN -
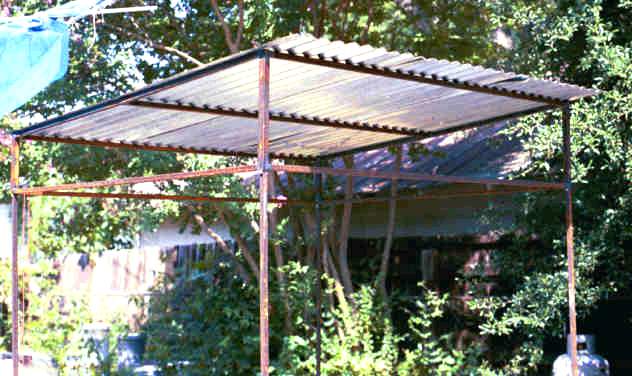 Obviously, gear needs to be more or less
protected from the weather, including rain. In addition to the discussion of temperature changes below,
insulating blanket, castable, and fire brick can absorb
water and if heated too fast the water can flash to steam
blowing apart the material. Water in blanket can so lower
the insulating value that it may take days to cook it out.
When I left the lid of my annealer askew when rewiring it
and it rained, I drilled a pair of holes in lower part of
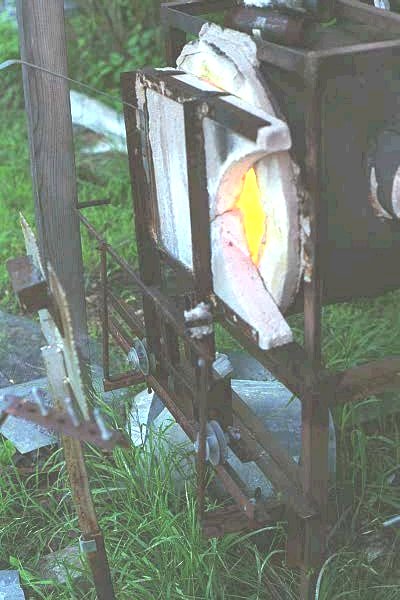
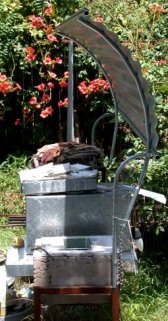
the case and water dribbled out. In a picture above, a heating element is shown that
I use for drying out the gas heated gloryhole and furnace
to drive Obviously, gear needs to be more or less
protected from the weather, including rain. In addition to the discussion of temperature changes below,
insulating blanket, castable, and fire brick can absorb
water and if heated too fast the water can flash to steam
blowing apart the material. Water in blanket can so lower
the insulating value that it may take days to cook it out.
When I left the lid of my annealer askew when rewiring it
and it rained, I drilled a pair of holes in lower part of
the case and water dribbled out. In a picture above, a heating element is shown that
I use for drying out the gas heated gloryhole and furnace
to drive
 off moisture over several hours. If the humidity
has been high or there has been a lot of rain, I pre-dry
the gloryhole. I commonly keep my annealer on and set to 90F so
that it is warmer than the outside air at night most of the year. [D
above] off moisture over several hours. If the humidity
has been high or there has been a lot of rain, I pre-dry
the gloryhole. I commonly keep my annealer on and set to 90F so
that it is warmer than the outside air at night most of the year. [D
above]
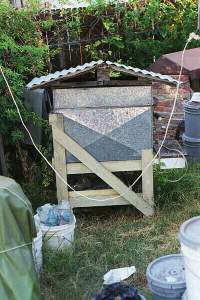
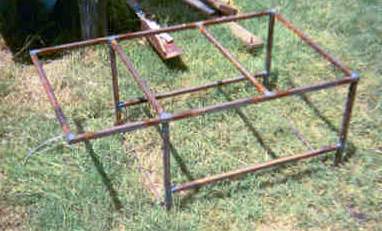
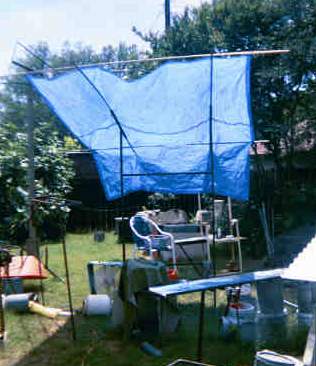
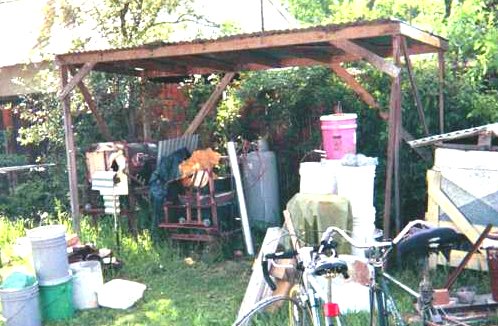
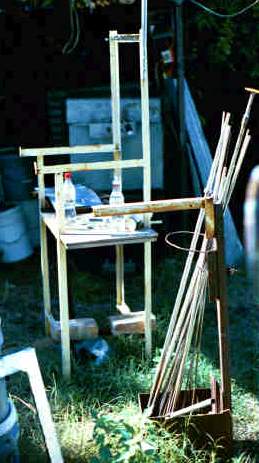
Still being used, but built earlier, is a wood frame hut, also with open
sides, [C above] This picture is from 1999 at
a time of garage reconstruction. The trees behind are now grown over
it and at one point a mass of thorny roses grew over the top - since died
and torn out. Although braced, when there was no
 bottom connection,
the legs were forced out, bowing the top down, which was corrected by
jacking the center and using a ground level wire across the back. bottom connection,
the legs were forced out, bowing the top down, which was corrected by
jacking the center and using a ground level wire across the back.
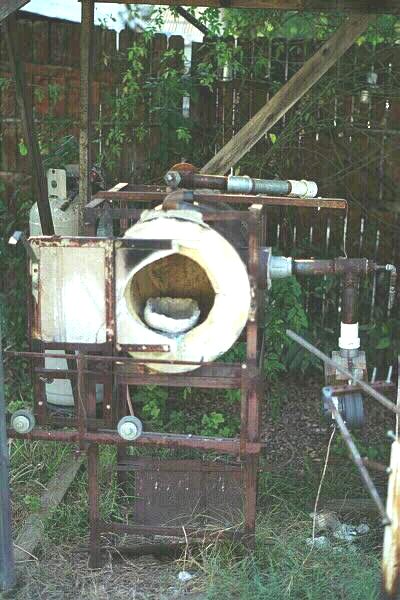
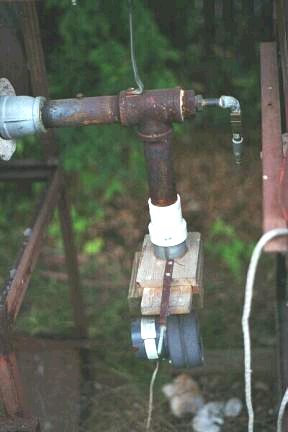
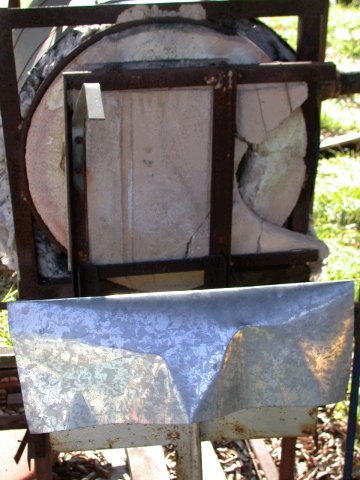
At right below the glory hole door is shown a roughly bent sheet metal cover
for the yoke which protects the two ball bearing transfer units shown
here from water damages.
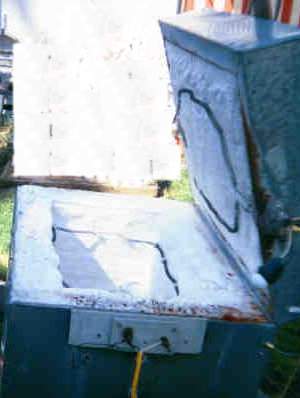
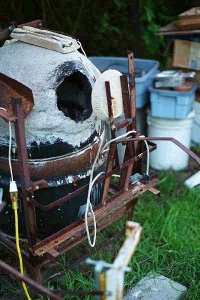
- TEMPERATURE CHANGES -
Obviously, when the temperature drops through freezing,
water buckets and other wet places need to be protected
or emptied. And high temperatures can melt wax used on
tools.
As the temperature rises and falls each day, equipment
can be damaged by the moisture from humidity. Part of my
annealer is rusty from this process. It happens because
the temperature inside the annealer is always "behind"
the daily temperature changes. In the evening, the inside
may be 85°F while the outside air has cooled to 60°F
with high humidity. As the air in the annealer cools and
contracts, humid air is sucked in, cooling on the metal
case and getting the whole wet. I have recently been
setting my annealer at 90°F to avoid that fluctuation,
especially into the higher humidity range.
Pipes can collect water inside and can condense moisture from the breath when cold enough. There was a thread
on this problem in cold studios, not just outdoors.
Besides corrosion that can occur, there is a risk of
being burned, because when the water drips on the hot
head, it flashes to steam which rapidly heats the pipe
for several feet back from the head. Solutions include
blowing out the pipes with compressed air, storing them
on a rack above the furnace, and having a pipe heater
that holds the pipes at an angle so air flows through
them.
- GROUND CONDITIONS -
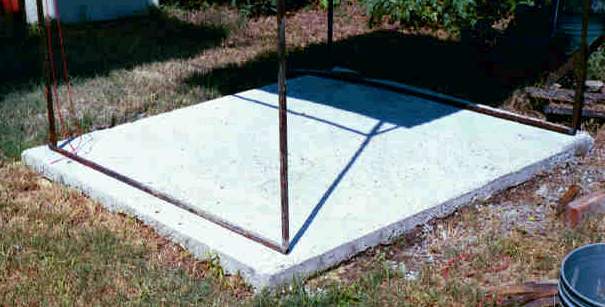 When working outdoors, it is better to
have a concrete slab and probably better to have a
pounded bare floor (like a blacksmiths) than grass, but
Art regrets not putting a slab in his otherwise enclosed
studio because rain does blow in and the dirt gets
slippery. A slab clearly costs money and effort, although
I managed to put a slab in my garage without killing
myself. One problem with a slab is that it places clear
limits on the space and walking off the edge tain't fun (if
digging down for a ground level slab is out of the
question.) [Picture shows 5.5 x 6.5 foot raised slab
installed to get equipment out from under wood frame roof.
D] When working outdoors, it is better to
have a concrete slab and probably better to have a
pounded bare floor (like a blacksmiths) than grass, but
Art regrets not putting a slab in his otherwise enclosed
studio because rain does blow in and the dirt gets
slippery. A slab clearly costs money and effort, although
I managed to put a slab in my garage without killing
myself. One problem with a slab is that it places clear
limits on the space and walking off the edge tain't fun (if
digging down for a ground level slab is out of the
question.) [Picture shows 5.5 x 6.5 foot raised slab
installed to get equipment out from under wood frame roof.
D]
- GRASS - Looking at some of my
pictures will quickly reveal that grass grows
everywhere and cutting it is not one of my
favorite activities. And I don't like killing it
with kill-all chemicals. So I have a gasoline
powered string cutter for trimming and try to
arrange things so mowing is not incredibly
difficult. A good point of grass is that if you
drop a piece and want to, you can usually rescue
it unbroken. Several of my pieces have carbon-from-burned-grass
images on them.
- DRY GRASS - Texas has long
periods in the years with little or no rain where
the grass dries out and causes a fire hazard. I
trim more industriously and keep a garden hose
ready with a cutoff valve at the end for quick
use. I usually wet down the area around the
gloryhole first.
- SOFT GROUND - While the
dirt in our area turns to the consistency of
concrete when really dry, it absorbs water like a
sponge and it is possible to have 2" of rain
fall in the yard and have no run off. When the
ground is this soft, equipment has to be planned
for it. Even if I had a concrete slab [added in
2001], I am not sure I would mount casters
permanently on the equipment, which is heavy
enough to require costly casters that are hardly
used and will dent under the weight with time.
In any case, I build my equipment with rails at
ground level on the sides and 6" up on the
front and back. This is most easily visible on
the bench above. The side
rails provide plenty of area to keep the units
from sinking into the ground. The uniform height
of the front and back means I can either roll a
caster rig under the rails or lift the unit on to
taller casters. I have a fairly expensive set of
casters that will carry 4,000 pounds which I keep
out of the weather and to which I rig various
platforms for moving scaffolding and glass stuff.
In reality, the 6" rail height is too low
for these casters and it gets lower as the side
rails crush the dirt and grass, so I usually end
up levering the side rails up onto 2x4's before
moving. Pressure treated 1x4's or 2x4's laid flat would
reduce sinking. If I had to do a lot of moving, I would
weld up a low rig with a jack or screw built in
and get casters with wider soft wheels to avoid
sinking into the soft ground.
- AIR CONDITIONS - Air in Texas is
memorably hot and is wet more often than I like to
consider, especially in recent years. See notes on humidity & temp
changes above. When the wind is
blowing, shelter from the sun must be anchored (next). It
is also very drying, beyond the exposure to the furnace
heat, so I keep water, soda, and Gatorade on hand (buy
Gatorade in powder form - 1 gallon envelopes or bigger -
at sporting goods stores or jars on the top shelf of grocery stores to save money over bottled.) I
have a couple of floor fans that don't get much use; I
find shade is more important outdoors.
Ventilation choices
- LIGHTING - In bright sunlight, it is possible to
work with a #5 welding shield in place and still see to maneuver although
best practice suggests not. At night, background lighting is required
for safety and detail lighting helps. Overall and security lighting are
provided by a yellow high pressure sodium fixture that is very efficient and
long lasting and comes on every night automatically, giving reasonable
lighting for the whole backyard from a mount about 15' up on a conduit set
above the corner of the garage. Further area lighting is provided by a
75 watt ordinary bulb mounted on a 10' pole [f]above a (barely) moveable
concrete base; an aluminum shield guards the bulb from rain and reflects
half the light back down. Under the edge of both shelters [C
D] are bulbs,
some CFB's, just above my head, controlled by switches centrally located.
2008-04-29
- ELECTRICITY - Working outdoors demands added
steps for safety with electricity since all metal must be assumed to be
grounded and a path for a shock and when the ground is damp, that is another
path. All my electrical outlets are up under the roof of shelters just
above my head and all are fed by GFCI's. All
wiring contains a safety ground. 2008-04-29
|
 a
above
a
above
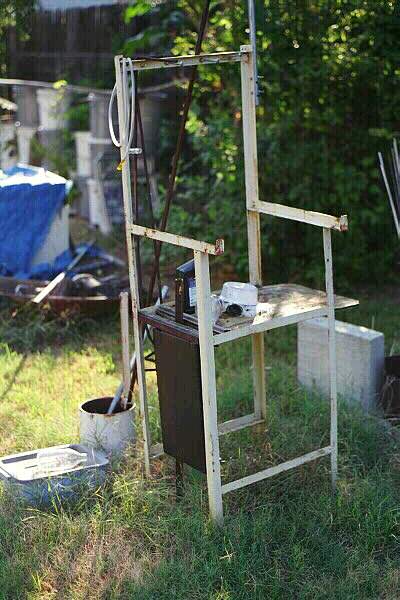
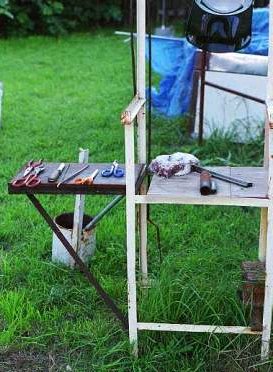 Notice that the marver (m)
is hinged at one end and tools are hung
up on the rail on pegs which are just 1/4" carriage bolts (which
have large round heads. (well, that doesn't show well in the
picture right, a shield is hanging from the
rail, top right.) The bucket of wet wood, once kept on the platform, now
sits on a waist high stand after I kept getting the marver wet. To the right is a third rail
(above), on a separate stand
that holds the end of the punty while I am attaching it. The
length of the rails is based on how far my arm will stretch when
I stand and reach (I could make them longer and step forward
while rolling the pipe, but I didn't.) A pipe hanger is located
at the top right corner (see above.) Between the picture above
and the one right, the plywood panel was replaced. On the plywood
right, the white mass is frax in a Corningware bowl that is a
catcher for ornaments while the loop is added to the top. The
round tubes are for making marbles.
Notice that the marver (m)
is hinged at one end and tools are hung
up on the rail on pegs which are just 1/4" carriage bolts (which
have large round heads. (well, that doesn't show well in the
picture right, a shield is hanging from the
rail, top right.) The bucket of wet wood, once kept on the platform, now
sits on a waist high stand after I kept getting the marver wet. To the right is a third rail
(above), on a separate stand
that holds the end of the punty while I am attaching it. The
length of the rails is based on how far my arm will stretch when
I stand and reach (I could make them longer and step forward
while rolling the pipe, but I didn't.) A pipe hanger is located
at the top right corner (see above.) Between the picture above
and the one right, the plywood panel was replaced. On the plywood
right, the white mass is frax in a Corningware bowl that is a
catcher for ornaments while the loop is added to the top. The
round tubes are for making marbles.