|
[Mark wanted to make an optic - my reply is:] If
you are doing a one shot, you could buy investment, cast a core
out of the investment, carve the core to the shape you want,
patching and repairing it as errors are made, cover the core with
wax and cut the wax to the outer shape you want, with sprues etc.,
cover the wax with investment in a tube shaped metal surround,
heat to remove the wax, further heat to dry the investment, and
pour. (Maybe pour a few small samples first to see how dry to get
it, etc.) When done you would break/wash the investment out - it
softens in water, unlike plaster/silica mix. |
|
NEW LEARNING 2001-06 - I
finally used the shellac I bought some time ago to coat the
outside of both a plaster and a sanded wood mold shape. It makes
removal of the mold shape much easier. I also did some casting
with shapes cut from pieces of Styrofoam, not removing them
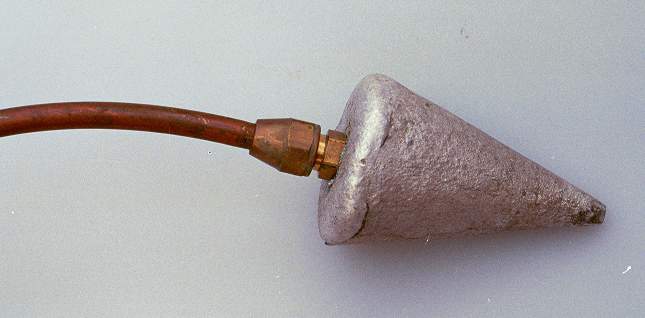
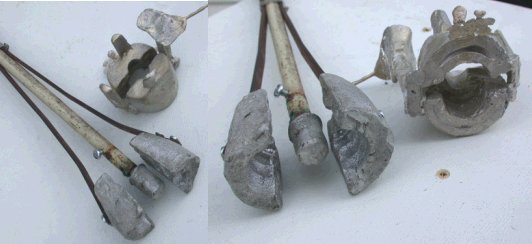
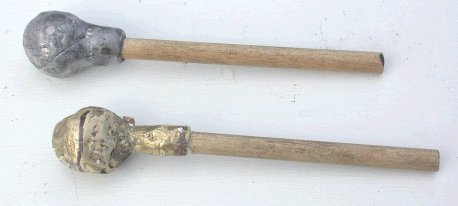
before pouring the metal. This is the second cast puffer head, much smoother than the first. Aluminum is tapped for 1/4" water pipe (about 1/2" OD) and the fitting shown allows the copper tubing for blowing. A reducing fitting 1/4" to 1/8" allows screwing it onto a standard air valve for a shop blower. |
|
CASTING - (Originally from Hot Glass Bits 41) - I have been teaching myself casting, borrowing generously from books, web sites and suppliers. My purpose is to be able to cast aluminum parts for tools to manipulate glass and brass or bronze pieces into which I might blow glass - goblet stems and feet, cages, etc. The aluminum I am using is from melting soda pop cans, most of which I drink - far too many as I see the accumulation. The brass, which hasn't been used much so far, is from some old brass letters and keys around the Store. My experiments this summer (1999) have been aimed at making a tool for shaping the necks of bottles so standard caps will fit with the additional goal of trying to put threads on for standard screw on caps. I have already learned that the latter is not going to be easy. In exploring for materials, I rather quickly settled in on Swest, a national supplier to the jewelry industry that is located here in Dallas. I gradually learned various things through books and looking at the supplies offered. I learned most of all that what I wanted to do was a rather awkward size, being big for jewelry related stuff and small for foundry casting sort of stuff. Previously, I had made an expedition to Ft. Worth and from a foundry supply company (all of them seeming to be over there) gotten a bag of premixed foundry sand (it has a chemical that forms a binding agent with the very fine sand when an astonishingly small amount of motor oil is added.) It is interesting stuff that I have not yet worked with very much. [I learned later that I was not making the sand nearly damp enough for most purposes - besides the oil, it needs water to the point it clings together. 2003-02-05] From Swest (and with their advice), I bought a box of investment, a modest supply of green casting wax, an alcohol lamp, and several tools. |
|
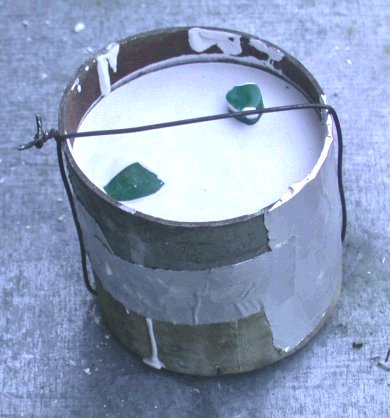
Investment looks like plaster, is much less complicated to mix and stands the heat of molten metal. It is not waterproof and in fact is removed from the molds and molded material by soaking in water. Investment is not strong enough to stand alone (I learned in one failure) when molten metal is added and must be contained inside a sleeve. Swest sells stainless steel sleeves with rubber bases and I bought one, but the sizes are limited and the prices go up rapidly. I happened across a length of 3" (nominal) thin wall conduit at the used metal yard and bought it for several purposes one of which is making these sleeves. I am thinking of getting some 4" conduit. [2001-10-09 I did, in fact, track down a source - Dealers Electric, a chain - and buy a 10' piece, about $20, which was cut apart to get it in my rental car. I have cut a chunk off for foundry and will cut a slice for drilling glass, putting silicone sealant on the lower edge to hold fluid. 2003-09-14 Did this latter, didn't work very well. Have made a number of rings of various heights and diameters 2, 3, 4" dia, 1, 2, 3, 4, 6 tall, plus sheet metal wrapped in cylinder and held by stainless steel band (hose) clamps, for the largest.]] [CUTTING large tubing so it has square ends: Wrap a piece of typing paper around the tubing until the ends (nearly) meet, line up the edge, tape it in place. Use a marking pen around the edge. Cut the tube with a hacksaw, saber saw or reciprocating saw. Image below as part of mold ends.] When using a proper SS sleeve, a rubber end cup both seals it and supplies a pattern for pouring the metal because the wax is built on the ring of the cup. I build my pieces to sit with flow tubes (vents and risers) pointed up and put a layer of thick investment in first after wrapping the bottom opening of the sleeve with aluminum foil and sitting it on a plate. Then somewhat thinner investment is poured around the wax model as I support it in place. Before pouring the metal, I carve out a funnel shape at the end of the risers, usually just before the final heating after wax melt out. [2003-09-14 I have changed methods after having the wax float up one too many times. I now make the risers and pouring funnel all the same height and turn the wax upside down, using silicone adhesive to glue it to the aluminum foil - I use heavy duty. This keeps the wax from floating and makes pouring the investment less of a two step process.] These mentions of wax make it obvious that I am using the lost wax method of casting. Getting the wax model that is to be lost is a multi-step process which I will go though without trying to cover everything in the books on casting. The overwhelming advantage of lost wax is that all the considerations of pattern casting - drafting the edges to remove the pattern, designing the pattern to avoid or relieve undercuts, getting the pattern out - can be set aside (mostly.) The disadvantage is that a new model must be made for every product, which may involve a master mold and time reworking the resulting model. But that can be an advantage, as the wax is nice for hands-on working with heated tools. (Basics) |
|
These are the steps, with added comments, in making the molds
for the bottle neck former I am fooling with now. The design (evolved
while working on the wax models, I will admit) is a three part
unit to be mounted on a 1/2" tubular shaft: a center post to
form the inside of the bottle opening and support the neck as two
blocks shaped to fit the neck ridges are closed with a plier
action to form the glass. The blocks have enough aluminum to
carry the heat (I hope [yup, when tested]) of the glass, which is
way above the melting point of aluminum. The center post is now
two cylinders in line, a larger short core inside the neck and a
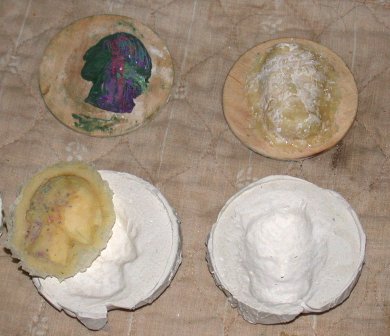
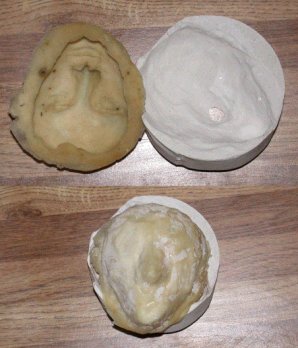
rod of smaller diameter but longer, supporting the center core. The original model was made by taking plasticine clay (artists' and children's non-softening modeling clay), forming a roughly shaped rod and fitting it in the bottle being used as a model. This soft clay model was then used to make a plaster mold in the halves of a small plastic bottle using standard clay mold techniques. (i.e. support the model so the plaster will come to the centerline of the model, pour plaster and set; treat the surface with English soap as a release, add the other half mold, cover the rest of the model, set and unmold.) After the model was made and used to make one aluminum casting, it became obvious that the core was too thick and too long. The original plaster mold was used to make additional wax models by adding plastic clay to reduce the diameter and length where needed. The final form is a rod 3/8" diameter about 2" long attached to a cylinder about 3/4" in diameter by 1" long which is rounded opposite the rod to more easily fit in the bottle neck and has a lip opposite (around the rod) to form the inside of the lip. (B) |
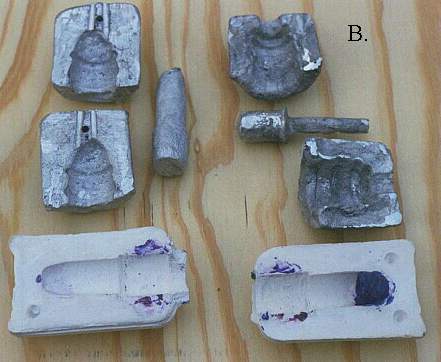
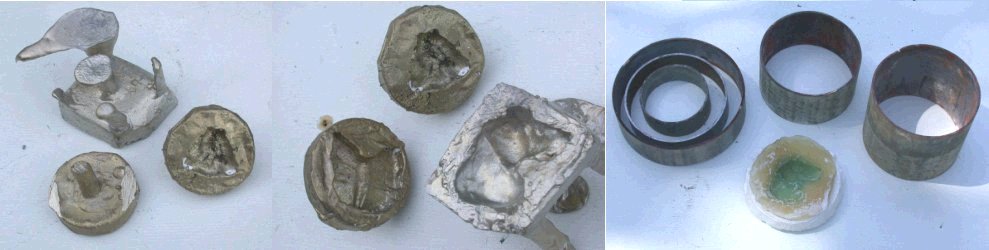

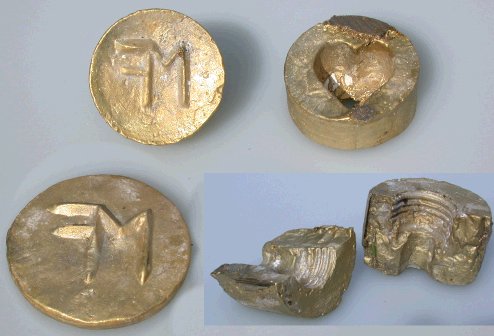

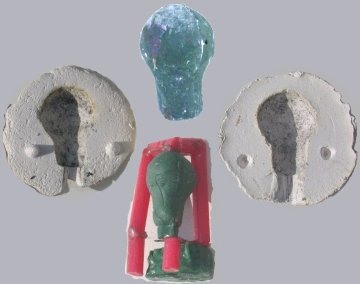 Top
center is the clay original, then the two part plaster mold used for casting
the lead at above, and wax cast from mold, sprued for better brass casting,
not yet cast.
2008-01-12
Top
center is the clay original, then the two part plaster mold used for casting
the lead at above, and wax cast from mold, sprued for better brass casting,
not yet cast.
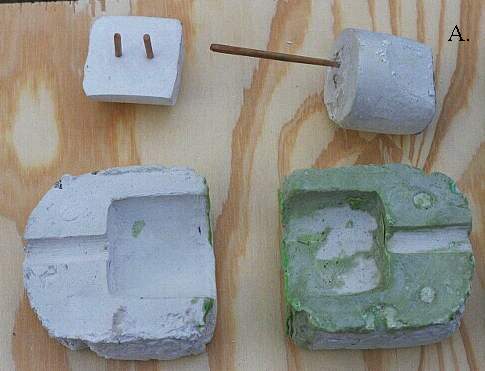
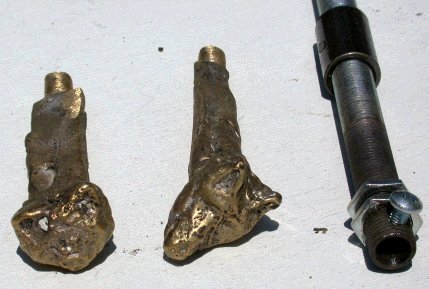
2008-01-12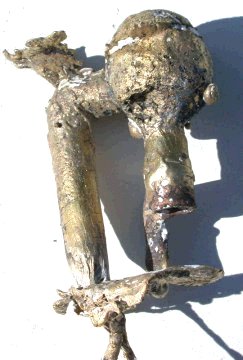 This
is the rough casting from the wax made by dipping and poured from above the
actual rather than into a sprue. The tube to the left is acting as a
vent from the side, so the top of the ball and stem are porous.
This
is the rough casting from the wax made by dipping and poured from above the
actual rather than into a sprue. The tube to the left is acting as a
vent from the side, so the top of the ball and stem are porous.