|
BACKGROUND - Down through the years, I have thought it would be
interesting to have a "car" that had front wheel drive and various back
ends, dividing behind the driver - short for city driving, longer for
group trips, minivan, pickup or even camper. Since this would be
awkward to store, etc., I considered a commercial scheme of renting the
specialize rear ends. Besides the rather critical point of attaching the
two parts under current side collision standards, another problem needing
solution was locating the gas tank(s) and having the ability to drive
(move) the front end disconnected. Obviously a fantasy in a full sized vehicle, I had considered several times making a model in metal, perhaps motorized with radio control. Then as I began working in in polymer clay making hollow parts with slab construction and answering online questions, I saw an opportunity and challenge in making a mold for polymer and possibly making a car body in the plastic. This is a report on the results. |
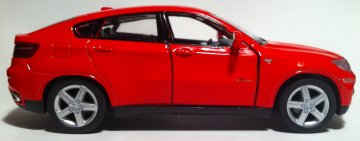 With
the project in the back of my mind, I came across a display of car models
or reasonable size at my CVS drug store for only $5.99, buying this one
(Audi A8) for the configuration of the front end. My actual original
thought was to cut this apart, dealing with the chassis somehow as I took
the model apart, but then doing a polymer clay version intruded its
thoughts. With
the project in the back of my mind, I came across a display of car models
or reasonable size at my CVS drug store for only $5.99, buying this one
(Audi A8) for the configuration of the front end. My actual original
thought was to cut this apart, dealing with the chassis somehow as I took
the model apart, but then doing a polymer clay version intruded its
thoughts. |
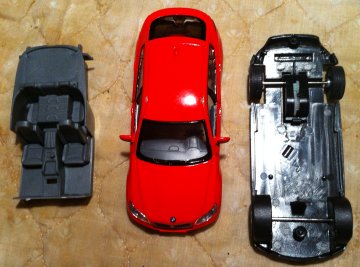 This
is the model disassembled into its lower running gear (pull the toy
back and let go and a spring drives it forward), the inner shell that
provides "seats" and "luggage" and conceals the model's works, and the
body shell. This
is the model disassembled into its lower running gear (pull the toy
back and let go and a spring drives it forward), the inner shell that
provides "seats" and "luggage" and conceals the model's works, and the
body shell.The model has clear plastic windows except the doors and the front doors open. The body was prepared for making the mold by filling the inside of the door windows and the wheel wells with aluminum foil supported by plasticine clay. |
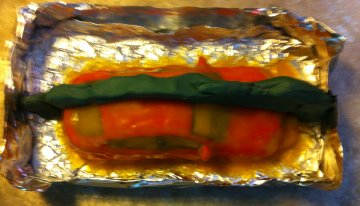
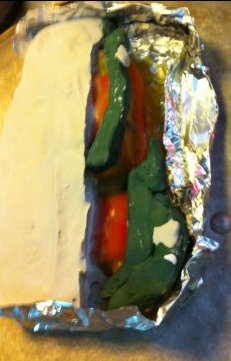
 The
mold detail is done with latex rubber
molding compound with the result shown here folded open before showing
some of the steps in the process. Normally this would not happen until a
plaster backing is made (below). The mold shown was built up over
several days by painting a moderately thick layer of the creamy white
latex over the model and letting it set to the amber color shown. The
process could have been sped up with a small fan. The
mold detail is done with latex rubber
molding compound with the result shown here folded open before showing
some of the steps in the process. Normally this would not happen until a
plaster backing is made (below). The mold shown was built up over
several days by painting a moderately thick layer of the creamy white
latex over the model and letting it set to the amber color shown. The
process could have been sped up with a small fan. In the far, the emulsion of the latex in water is kept from setting by ammonia in the water. |
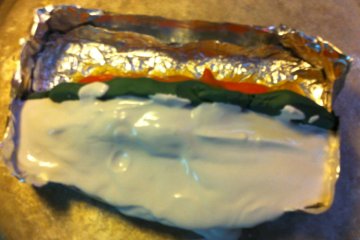
 The
latex mold holds detail marvelously but is so soft that except in unusual
conditions support must be provided to put material in the mold without
distorting it. The
latex mold holds detail marvelously but is so soft that except in unusual
conditions support must be provided to put material in the mold without
distorting it. Although not a very good picture, this shot shows the transparency of the mold material and the flange extending it out onto to the foil. But the purpose of the image is to show the first step in making a plaster backing that does not trap the model in the plaster. A ridge of plasticine clay has been placed with one side aligned with the centerline of the car. |
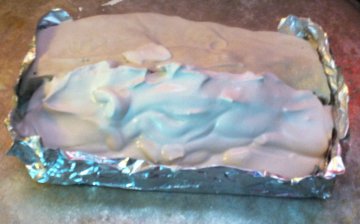
 Heavy
duty aluminum foil is folded up to make a basin to control the plaster
of Paris which is made moderately thick. The foil could have
been doubled to prevent the sag visible at the bottom or a flat
container could have been pushed up against the outside. Heavy
duty aluminum foil is folded up to make a basin to control the plaster
of Paris which is made moderately thick. The foil could have
been doubled to prevent the sag visible at the bottom or a flat
container could have been pushed up against the outside. |
 Once the plaster has set, the plasticine is pulled back and removed,
leaving an edge for the centerline. The plaster is sprayed with a
separator - I use spray vegetable cooking fat.
Once the plaster has set, the plasticine is pulled back and removed,
leaving an edge for the centerline. The plaster is sprayed with a
separator - I use spray vegetable cooking fat. |
 A second batch of plaster is added. Ideally, both sides will be
leveled so when the plaster is upside down it sits level on its own, but
this can be a minor consideration.
A second batch of plaster is added. Ideally, both sides will be
leveled so when the plaster is upside down it sits level on its own, but
this can be a minor consideration. |
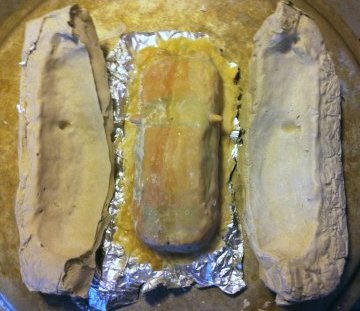 When set and partly dried to increase strength, the bottom foil and the
two sides are pulled free to continue drying. Latex rubber turns
white when damp as from the plaster and it shows in this picture where the
right half of the model was covered about 24 hours after the left and thus
is damper at the time of separation.
When set and partly dried to increase strength, the bottom foil and the
two sides are pulled free to continue drying. Latex rubber turns
white when damp as from the plaster and it shows in this picture where the
right half of the model was covered about 24 hours after the left and thus
is damper at the time of separation. |
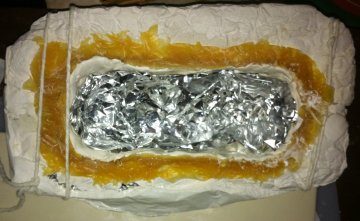 Placed
back in the plaster backing which was tied together, white original
Sculpey (softer than Sculpey III) was rolled out about 1/8" thick and cut
to approximate shape and pressed into the bottom and sides of the rubber
mold. The aluminum foil shown was added to provide support during
baking. Before attempting to remove the rubber mold, the whole thing
was put in the refrigerator for several hours to make the polymer clay as
stiff as possible to reduce damage. Placed
back in the plaster backing which was tied together, white original
Sculpey (softer than Sculpey III) was rolled out about 1/8" thick and cut
to approximate shape and pressed into the bottom and sides of the rubber
mold. The aluminum foil shown was added to provide support during
baking. Before attempting to remove the rubber mold, the whole thing
was put in the refrigerator for several hours to make the polymer clay as
stiff as possible to reduce damage.The rubber bent backwards off the front and back, releasing the stiffened clay. |
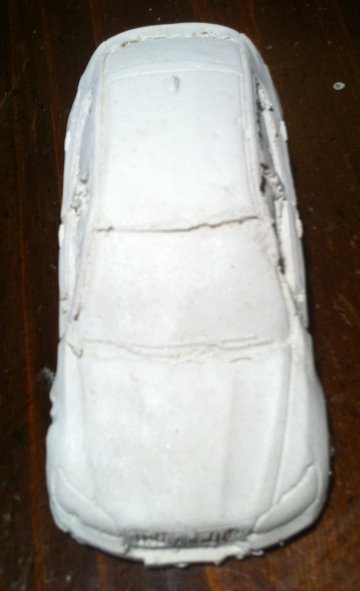
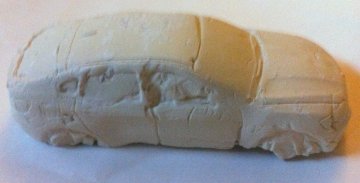 The result after baking with no trimming or sanding. As mentioned above,
the door windows and wheel wells were lined before the rubber mold was
painted on.
The result after baking with no trimming or sanding. As mentioned above,
the door windows and wheel wells were lined before the rubber mold was
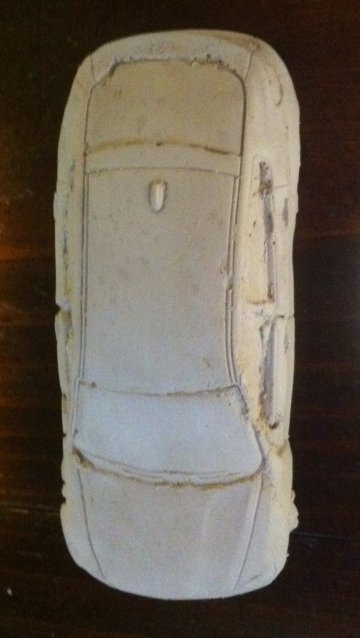
painted on.Below are pictures of the baked product and a plaster copy made in the mold - the plaster shows more detail of lines because of its liquid nature and find grain. |
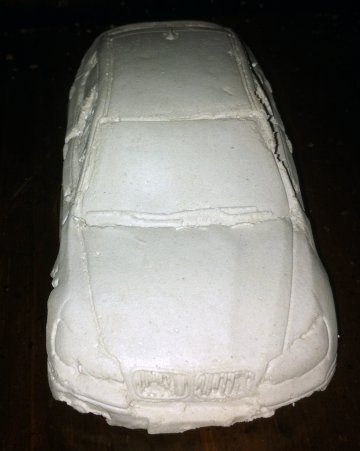 |
| The plaster copy from the mold, directly below and a repeat of the polymer clay image above for side-by-side. |
 |